RailCore® Labs
RailCore® is a family of Core-XY based Reprap 3D printers designed by J. Steve White, Tony Akens, and Ben Withem.
In the standard build, the RailCore’s Duet2 board supports only 24v Fans but the Duex5 makes it very easy to add 12v Fans to your design.
Inexpensive 12v fans in 120mm, 80mm or other common computer-case size can be used to cool the electronics enclosure or printer interior, and the Duet firmware makes it easy to assign a thermostat for fan control. The Duex5 provides a built-in 12v 2A switching regulator for LEDs or Fans, but it is not enabled by default.
Enable the 12v Power Supply
Study the Duex5 Connection Pinout to identify the INT 12V EN jumper near the top-left of the board.
You must connect a jumper across these two pins to turn on the 12v power supply, as it is not enabled by default.
Change the V_FAN power to 12v
By default, the Duex uses 24v for all V_FAN connections. Locate V_FAN JUMPER SELECT and move the jumper from VIN (far left) to 12V in the middle. This changes all V_FAN PWM ports to use 12v.
Connect 12v Fans (2-wire or 3-wire)
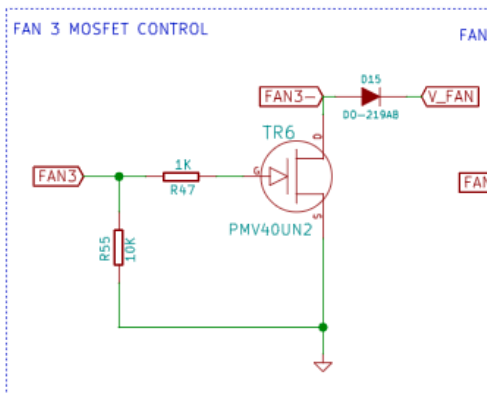
The 2-pin ports FAN3 to FAN8 can be used for 12v fans.
Note that these ports share a common +12v V_FAN supply which is powered at all times. The negative or ground of the fan is modulated to adjust power for PWM. Multiple fans can share positive power, but not a common ground!
Enable Fans
Direct speed control
Each fan can be added as a controllable PWM fan with DWC (Web) control over speed:
M106 P3 H-1 B0.2 I0 C"HappyFan" ; FAN3
Here the P3 indicates the port, and other options configure the initial burst and name.
Thermostat control
To use thermostatic control instead of direct PWM setting, you must first configure a Virtual Heater with a thermometer of interest. For example, an extra NTC 100K added to E4 might be configured as Virtual Heater #106 this way:
M305 P106 X5 T100000 B3950 R4700 C0 H0 L0 S"Chamber"
Then the fan can use this Virtual Heater to adjust fan speed for a target temperature:
M106 P3 H106 T60:62 L0.01 S1.00 B0.1 I0 C"Chamber Fan"
Here the H106 refers to the Virtual Heater assigned, and P3is the FAN3 port on Duex. The fan will turn on 1% speed at 60°C and ramp to maximum 100% speed by 62°C, which holds the temperature pretty even and close to 60.
For individual filaments, you could even adjust just the target temperature set-point with gcode, for example: M106 P3 T45:47.
Note that a fan configured for Thermostatic control will not appear in the web interface. You can check its operation with M106 P3 in this example.
RPM Speed input
The Duex brings out pin PB6 on the GPIO header for Fan RPM monitoring. Unfortunately, this does not appear to be compatible with PWM speed control, and may be mismatched to the pules-per-RPM used by some computer fans. Connecting PB6 requires an inline diode for 3-wire fans, as described in the Duet Fan documentation.
On RRF2, it’s useful only as a displayed value, and probably not worth the effort to connect.
2 & 3-Wire Fan speed control
In a 2-wire or 3-wire PWM fan, the Duet is interrupting power to the fan to adjust its speed. Small pulses of power cause the fan to turn slowly, while full-time power turns at maximum speed. The Duex pulses power 250 times a second on its PWM Fan Ports. If the fan has a third wire, it is to report the speed back to the controller for RPM display, but it doesn’t control anything.
4-Wire Fans
“Four-wire” fans borrowed from the Personal Computer market can operate differently than 2-Wire (Power-only) or 3-Wire (Power & RPM reporting).
The fourth “Control PWM” wire allows the supply voltage to be constant (always on), while this new PWM logic signal to the fan tells it how fast to run. This can result in a fan with more-reliable low-speed operation, precise and predictable speed control, and less audible humming since the power is not being interrupted or pulsed. Since the control board does not have to modulate power, higher-power fans can be used without any load on the PWM line.
Since 4-wire fans usually default to “always on”, most can also be used as 2-wire or 3-wire fans just fine, but it’s better to operate them correctly.
The specific wire colors are not standardized, but the pinout is typically:
- Ground (Black or Gray)
- +12V Power (Red or Yellow)
- Sense, Tachometer (Yellow or Green)
- Control PWM (Blue)
CoolerMaster has a nice fan pinout chart with their own typical wire colors.
Ground for 4-Wire Fans
Unlike the 3-wire PWM fans, these fans need constant fixed ground, from the power connector. Do Not Use a PWM Fan port for power and ground! Those are not constant ground.
Power for 4-Wire Fans
This is easy. The 4-wire fan gets constant power at all times, even when not operating. Simply connect the +12V to any fixed 12v supply. The Duex has a 2-pin 12v power connector right above the Enable jumper shown above. (This one has an connector up-side-down from most.) You can use this to power your fans, or any other 12v supply, regardless of the other V_FAN voltages. You could also use a fixed “always-on” FAN port, if the voltage matches your fan.
Control RPM for 4-Wire fans
The control signal for fan speed should be 25,000 Hz, which sadly excludes the slower (250 Hz) PWM ports on the Duex. The three Duet2 PWM Fan Ports will do just fine here. (FAN0, FAN1, FAN2). You could even set your Duex to 24v V_FAN and move some existing hotend or part-fans from Duet to Duex to free up these valuable high-speed PWM ports, depending on your needs.
PWM FAN “ground” as Speed control
This is a little bit counterintuitive, but when used with a 4-wire Fan, we only need the Ground pin of the PWM Fan port to control the speed. Remember that the power for your fan comes from elsewhere, and this is now just a PWM signal to set the speed. This special wiring is what distinguishes the 4-Wire fan from the 3-wire one, so ensure it is done correctly. We want just the one ground wire from FAN2, for example. Ignore the V_FAN pin on FAN2 and leave it unconnected, since it can be any voltage unrelated to the new fan.
RRF2 Configuration
The 4-Wire fans should have an F25000 parameter to turn up the PWM rate for speed control. To use the Fan ground signal as a 4-wire control, the PWM signal must be Inverted as well, using the I1 parameter on setup:
M106 P2 I1 F25000 H-1 L0.20 S1.00 I1 C"Top" ; FAN2 Enclosure(Duet)
Most 4-wire fans have a minimum operating pulse width, below which they do not spin. This is set with the L parameter above, to 20% in this example. This causes the fan to spin for even 1% usage. Of course, the fan can also be under thermostatic control by use of the H heater selection and T temperature setpoints.
Optional tachometer sense line
Like the 3-wire fans, there is a pulsed output from the fan to report back to the Duet the actual rotation speed of the fan. This requires a diode to connect to Duet, and there is only one input. It is not useful for much, and just lets RRF show the fan speed in the web interface. More info here if you want to wire it up: Duet Fan documentation
Complete wiring:
In review, the four-wire fan will be wired:
- Ground to any ground
- Power to constant 12v power
- Control PWM to the Ground pin of a FAN port
- (Optional) Fan rotation speed reporting via diode to
PB6