RailCore® Labs
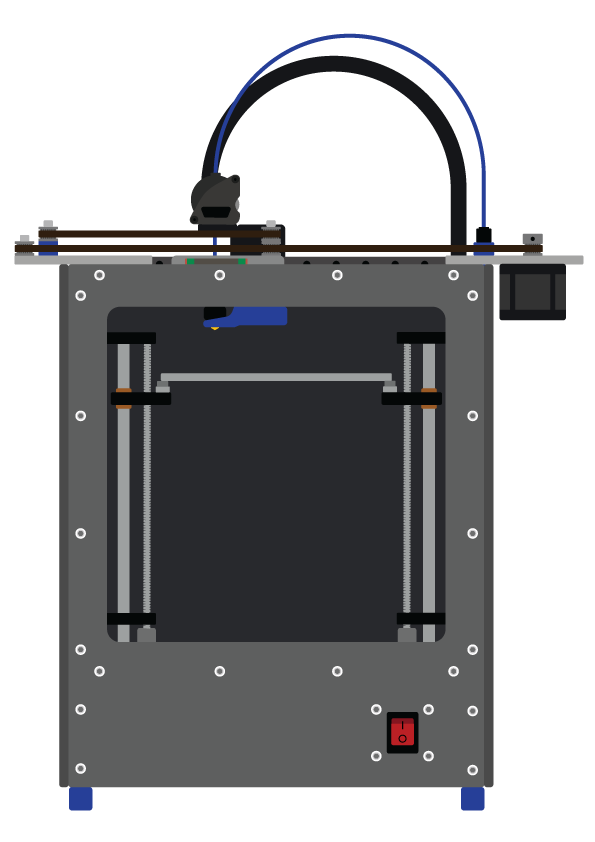
RailCore® is a family of Core-XY based Reprap 3D printers designed by J. Steve White, Tony Akens, and Ben Withem.
RailCore Klipper config guide
This walks through a Klipper printer.cfg for a RailCore, section by section. The
sample configs put it all together:
Every value marked CHECK: in the samples must be verified on your printer. They come from the
kit RRF configs and the build guides, and RailCores differ: self-sourced parts, different probe
mounts, different hotends. Never copy heater limits, PID values or input shaper numbers from
another machine.
New to Klipper? Read the Klipper landing page first.
1. Bring-up order
Do these in order, one at a time. Klipper’s Config checks page has the details for each.
- Set
[mcu] serial:(ls /dev/serial/by-id/*on the host), thenFIRMWARE_RESTART. QUERY_ENDSTOPSwith each switch released and pressed (X, Y, probe).STEPPER_BUZZ STEPPER=stepper_x(andstepper_y,stepper_z,stepper_z1,stepper_z2,extruder): confirm each motor moves and which way.- Heaters: watch the temperatures at room temperature, then
PID_CALIBRATE HEATER=extruder TARGET=240andPID_CALIBRATE HEATER=heater_bed TARGET=100, thenSAVE_CONFIG. - Home X and Y with a hand on the power switch. Then the probe, then Z (sections 5 and 6 below).
Z_TILT_ADJUST,PROBE_CALIBRATE, a mesh, input shaping, then your first print.
The build guide’s S) First Moves (Mini: S) does the same checks for RRF; the expected results are the same.
2. Kinematics and motors
[printer]
kinematics: corexy
max_velocity: 400
max_accel: 3000        # raise after input shaping
max_z_velocity: 15
max_z_accel: 100
The RailCore is a standard CoreXY. On the RailCore II (build guide J and Q):
- Both X/Y motors are on the right side of the frame, idlers on the left.
- The rear motor plugs into the Duet X port and is Klipper’s
stepper_x. - The front motor plugs into the Duet Y port and is
stepper_y. - X homes to the left (endstop at the rear left, X min). Y homes to the front (the
endstop on the Y carriage hits the front X carriage, Y min). Both use
position_endstop: 0.
On the RailCore Mini (guide Q) X homes to
max (endstop at the rear right) and Y to min, so stepper_x uses
homing_positive_dir: true and position_endstop: 150. The kit config.g maps X to drive 6 and Y
to drive 5, but the guide’s wiring step labels them the other way round: check with the motion test.
Steps: RRF’s steps/mm becomes rotation_distance (mm per motor turn).
Klipper’s rotation distance guide explains it.
| kit RRF | Klipper | |
|---|---|---|
| X/Y, 16T pulley, 0.9° motors | M92 X200 Y200 |
rotation_distance: 32, full_steps_per_rotation: 400 |
| Z, TR8x4 leadscrew, 0.9° motors | M92 Z1600 |
rotation_distance: 4, full_steps_per_rotation: 400 |
| Z, TR8x2 leadscrew, 0.9° motors | M92 Z3200 |
rotation_distance: 2, full_steps_per_rotation: 400 |
| Extruder, RailCore II kit BMG, 0.9° motor | M92 E837 |
rotation_distance: 7.646, full_steps_per_rotation: 400 (calibrate) |
| Extruder, Mini kit LGX Lite, 1.8° motor | M92 E562 |
rotation_distance: 5.694, full_steps_per_rotation: 200 (calibrate) |
The general rule: rotation_distance = full_steps_per_rotation × microsteps ÷ steps_per_mm.
Motor current: RRF’s M906 is in mA, Klipper’s run_current is in amps RMS. Don’t copy the
number across: set it from your motor’s rated current (about 70% of rating is a sane start) and
check the motors stay below about 70 °C. The kit LDO X/Y motors (42STH47-1684MAC) are rated 1.68 A.
Directions: RRF’s M569 S0/S1 does not map one-to-one onto Klipper’s dir_pin. If a motor runs
the wrong way, add or remove ! in front of its dir_pin. If X moves when you asked for Y, or the
axes move diagonally, the X/Y motor plugs are swapped or one direction is wrong.
3. Three Z motors and z_tilt
The RailCore II and the Mini both lift the bed with three independent leadscrews, each on its own
driver. Klipper’s [z_tilt] probes the
bed and moves each motor to level it: the same job as RRF’s M671 plus G32/bed.g.
Define the motors as [stepper_z], [stepper_z1] and [stepper_z2]. Only stepper_z carries the
endstop and travel settings. The order matters: the first line of z_positions belongs to
stepper_z, the second to stepper_z1, the third to stepper_z2.
RailCore II kit (build guide H and Q; two motors on the left, one on the right):
| Klipper | Duex 5 drive | position | kit RRF M671 |
|---|---|---|---|
stepper_z |
5 | front left | X-10 Y22.5 |
stepper_z1 |
6 | rear left | X-10 Y277.5 |
stepper_z2 |
7 | right | X333 Y150 |
[z_tilt]
z_positions:
    -10, 22.5     # stepper_z  front left    CHECK: measure yours
    -10, 277.5    # stepper_z1 rear left
    333, 150      # stepper_z2 right
points:           # NOZZLE positions; the probe lands at point + probe offset
    20, 0
    20, 230
    270, 108
speed: 150
horizontal_move_z: 5
retries: 5
retry_tolerance: 0.0075
RailCore Mini kit (one motor on the left, two on the right):
| Klipper | Duet 3 Mini drive | position | kit RRF M671 |
|---|---|---|---|
stepper_z |
4 | left | X-5 Y90 |
stepper_z1 |
3 | rear right | X165 Y155 |
stepper_z2 |
2 | front right | X165 Y22.5 |
Notes:
z_positionsare the leadscrew (pivot) positions in nozzle coordinates, so they sit outside the bed. The kit config says to measure “to the bolt for the yoke of each leadscrew”. The kit numbers are a good start; one community 300ZL measured-11,20 / -11,274 / 347,148. Small errors only cost an extra retry.pointsare nozzle positions. Klipper moves the nozzle there and the probe lands at the point plusx_offset/y_offset. Put one point close to each leadscrew, and check every point puts the probe on the bed: thePROBE_LEADSCREWSmacro in the sample visits each one.- Level the bed by hand first (turn the leadscrews with the power off, as in guide S), so
Z_TILT_ADJUSTonly has small corrections to make. - If a Z motor runs backwards,
Z_TILT_ADJUSTmakes the tilt worse on every retry. Stop, fix itsdir_pin, level by hand, try again. G32in the sample macros runsG28,Z_TILT_ADJUST,G28 Z, the same name as on RRF.
4. Probe (BLTouch)
The kits use a BLTouch. RailCore II kit wiring: signal to the Duet Z_Probe IN, servo wire to Duex 5 PWM1. Mini kit: both on io3.
[bltouch]
sensor_pin: ^PC1       # Duet 2 Z_Probe IN
control_pin: !PC3      # Duex 5 PWM1    CHECK
x_offset: 2            # kit RRF G31 X2 Y42    CHECK: depends on your mount
y_offset: 42
samples: 2
samples_result: median
samples_tolerance: 0.02
samples_tolerance_retries: 3
- RRF’s
G31 X Yand Klipper’sx_offset/y_offsetuse the same sign: where the probe is, relative to the nozzle. Measure yours: the kit mount, Mandala Rose Works mounts and printed mounts all differ. - Set
z_offsetwithPROBE_CALIBRATE(paper test), thenSAVE_CONFIG. Do not guess it. PROBE_ACCURACYshould give a range of a few hundredths of a millimetre. If not, fix the mount before tuning anything else.[homing_heaters]turns the hotend heater off during probing, like RRF’sM558 B1, so heater noise doesn’t trigger the BLTouch.- Other probes (inductive, IR, Klicky, Beacon, Cartographer and similar): use
[probe]or the probe’s own Klipper module. See Klipper’s Probe calibrate guide.
5. Homing
X and Y home to their switches. Z homes with the probe, so Klipper needs to know where to put the head first:
[stepper_z]
endstop_pin: probe:z_virtual_endstop
position_min: -2

[safe_z_home]
home_xy_position: 148, 108   # nozzle position that puts the probe at the bed centre
z_hop: 5
home_xy_position is a nozzle position: subtract the probe offset from the point you want to
probe. On the Mini the kit homez.g uses nozzle 73,33.
6. Bed mesh
The RailCore’s MIC6 plate is flat, and z_tilt takes out the tilt, so a mesh mostly corrects small
leadscrew and frame errors. Use Klipper’s adaptive mesh: it only probes under the part.
[bed_mesh]
mesh_min: 12, 42       # PROBE coordinates (not nozzle)
mesh_max: 280, 280
probe_count: 7, 7
algorithm: bicubic
fade_start: 1
fade_end: 10
adaptive_margin: 5

[exclude_object]
- Unlike
z_tiltpoints,mesh_min/mesh_maxare probe coordinates. The kit RRF mesh wasM557 X10:280 Y50:280. BED_MESH_CALIBRATE ADAPTIVE=1needs[exclude_object]and “Label objects” turned on in your slicer. Without it, Klipper probes the full grid.- Always level with
Z_TILT_ADJUSTbefore meshing. See Klipper’s Bed Mesh guide.
7. Input shaping
Klipper measures the printer’s resonances and picks a shaper. This is usually the biggest quality
gain over a stock setup, and it lets you raise max_accel.
- Mount an ADXL345 on the hotend carriage (rigidly: screws, not tape).
- Wire it to the Raspberry Pi’s SPI pins, or use a USB accelerometer board. Klipper’s Measuring Resonances guide has the wiring.
- Uncomment the
[mcu rpi],[adxl345]and[resonance_tester]sections in the sample and setprobe_points: 150, 150, 20(Mini:75, 75, 20). - Run
ACCELEROMETER_QUERY, thenSHAPER_CALIBRATE, thenSAVE_CONFIG.
The X and Y frequencies differ between RailCores (belt tension, carriage mass, hotend, panels), so measure your own. Re-measure after changing belts or the toolhead.
8. Heaters and safety
- Thermistor types: the RailCore II kit hotend (RRF
B4725 C7.06e-8) isATC Semitec 104GT-2; a Slice Engineering thermistor isSliceEngineering 450; the E3D Revo (Mini kit) isATC Semitec 104NT-4-R025H42G. The kit bed thermistor (B3950) isGeneric 3950. The Mini’s bed (B4240) needs a custom[thermistor]section; the sample has one. max_temp: the kit RRF limit for the hotend is 285 °C (M143 S285). Never set it above what your hotend, thermistor and heater are rated for.- PID values in the samples are placeholders. Run
PID_CALIBRATEfor both heaters before printing. - Leave
[verify_heater]at Klipper’s defaults. It shuts the printer down if a heater stops heating as expected, the job RRF’s heater fault detection does. Fix the cause, don’t loosen it. - The RailCore II bed is mains-powered through an SSR. Klipper drives it at the default 0.1 s PWM cycle (10 Hz). Use a zero-cross SSR. An SSR can fail shorted (stuck on), which no firmware can catch, so a thermal fuse on the heater pad is cheap insurance.
- On the RailCore II kit the Keenovo pad’s own thermistor goes to the Duex 5 E4 thermistor input;
the sample reads it as an extra
[temperature_sensor]for monitoring. - The RailCore II kit hotend fan is on an always-on header, so it needs no config. On the Mini it is
on out6 and runs as a
[heater_fan]above 50 °C, as in the kit config.
9. Macros
The shared macros file has:
G32:G28,Z_TILT_ADJUST,G28 Z(same name as on RRF).PRINT_START BED=60 HOTEND=210: heat the bed, home,Z_TILT_ADJUSTat temperature, adaptive mesh, heat the nozzle, purge line.PRINT_END: retract, lift, park at the rear left, heaters and motors off.PROBE_LEADSCREWS: visits eachz_tiltpoint so you can check the probe lands on the bed.
Slicer start G-code (PrusaSlicer, SuperSlicer, OrcaSlicer):
PRINT_START BED=[first_layer_bed_temperature] HOTEND=[first_layer_temperature]
Cura: PRINT_START BED={material_bed_temperature_layer_0} HOTEND={material_print_temperature_layer_0}.
End G-code: PRINT_END. Remove the slicer’s own heat-up and homing lines so they don’t run twice.
PAUSE, RESUME and CANCEL_PRINT come from Mainsail’s mainsail.cfg or Fluidd’s fluidd.cfg;
include whichever your installer created.
10. Tuning after the first print
- Extruder
rotation_distance: extrude 100 mm and measure (Rotation distance guide). - Pressure advance, per filament.
- Raise
max_acceltoward whatSHAPER_CALIBRATErecommends.
Questions: the #help channel on the RailCore Discord. If you find a value in the samples that is wrong for a stock kit, open an issue or PR on railcore/configs.